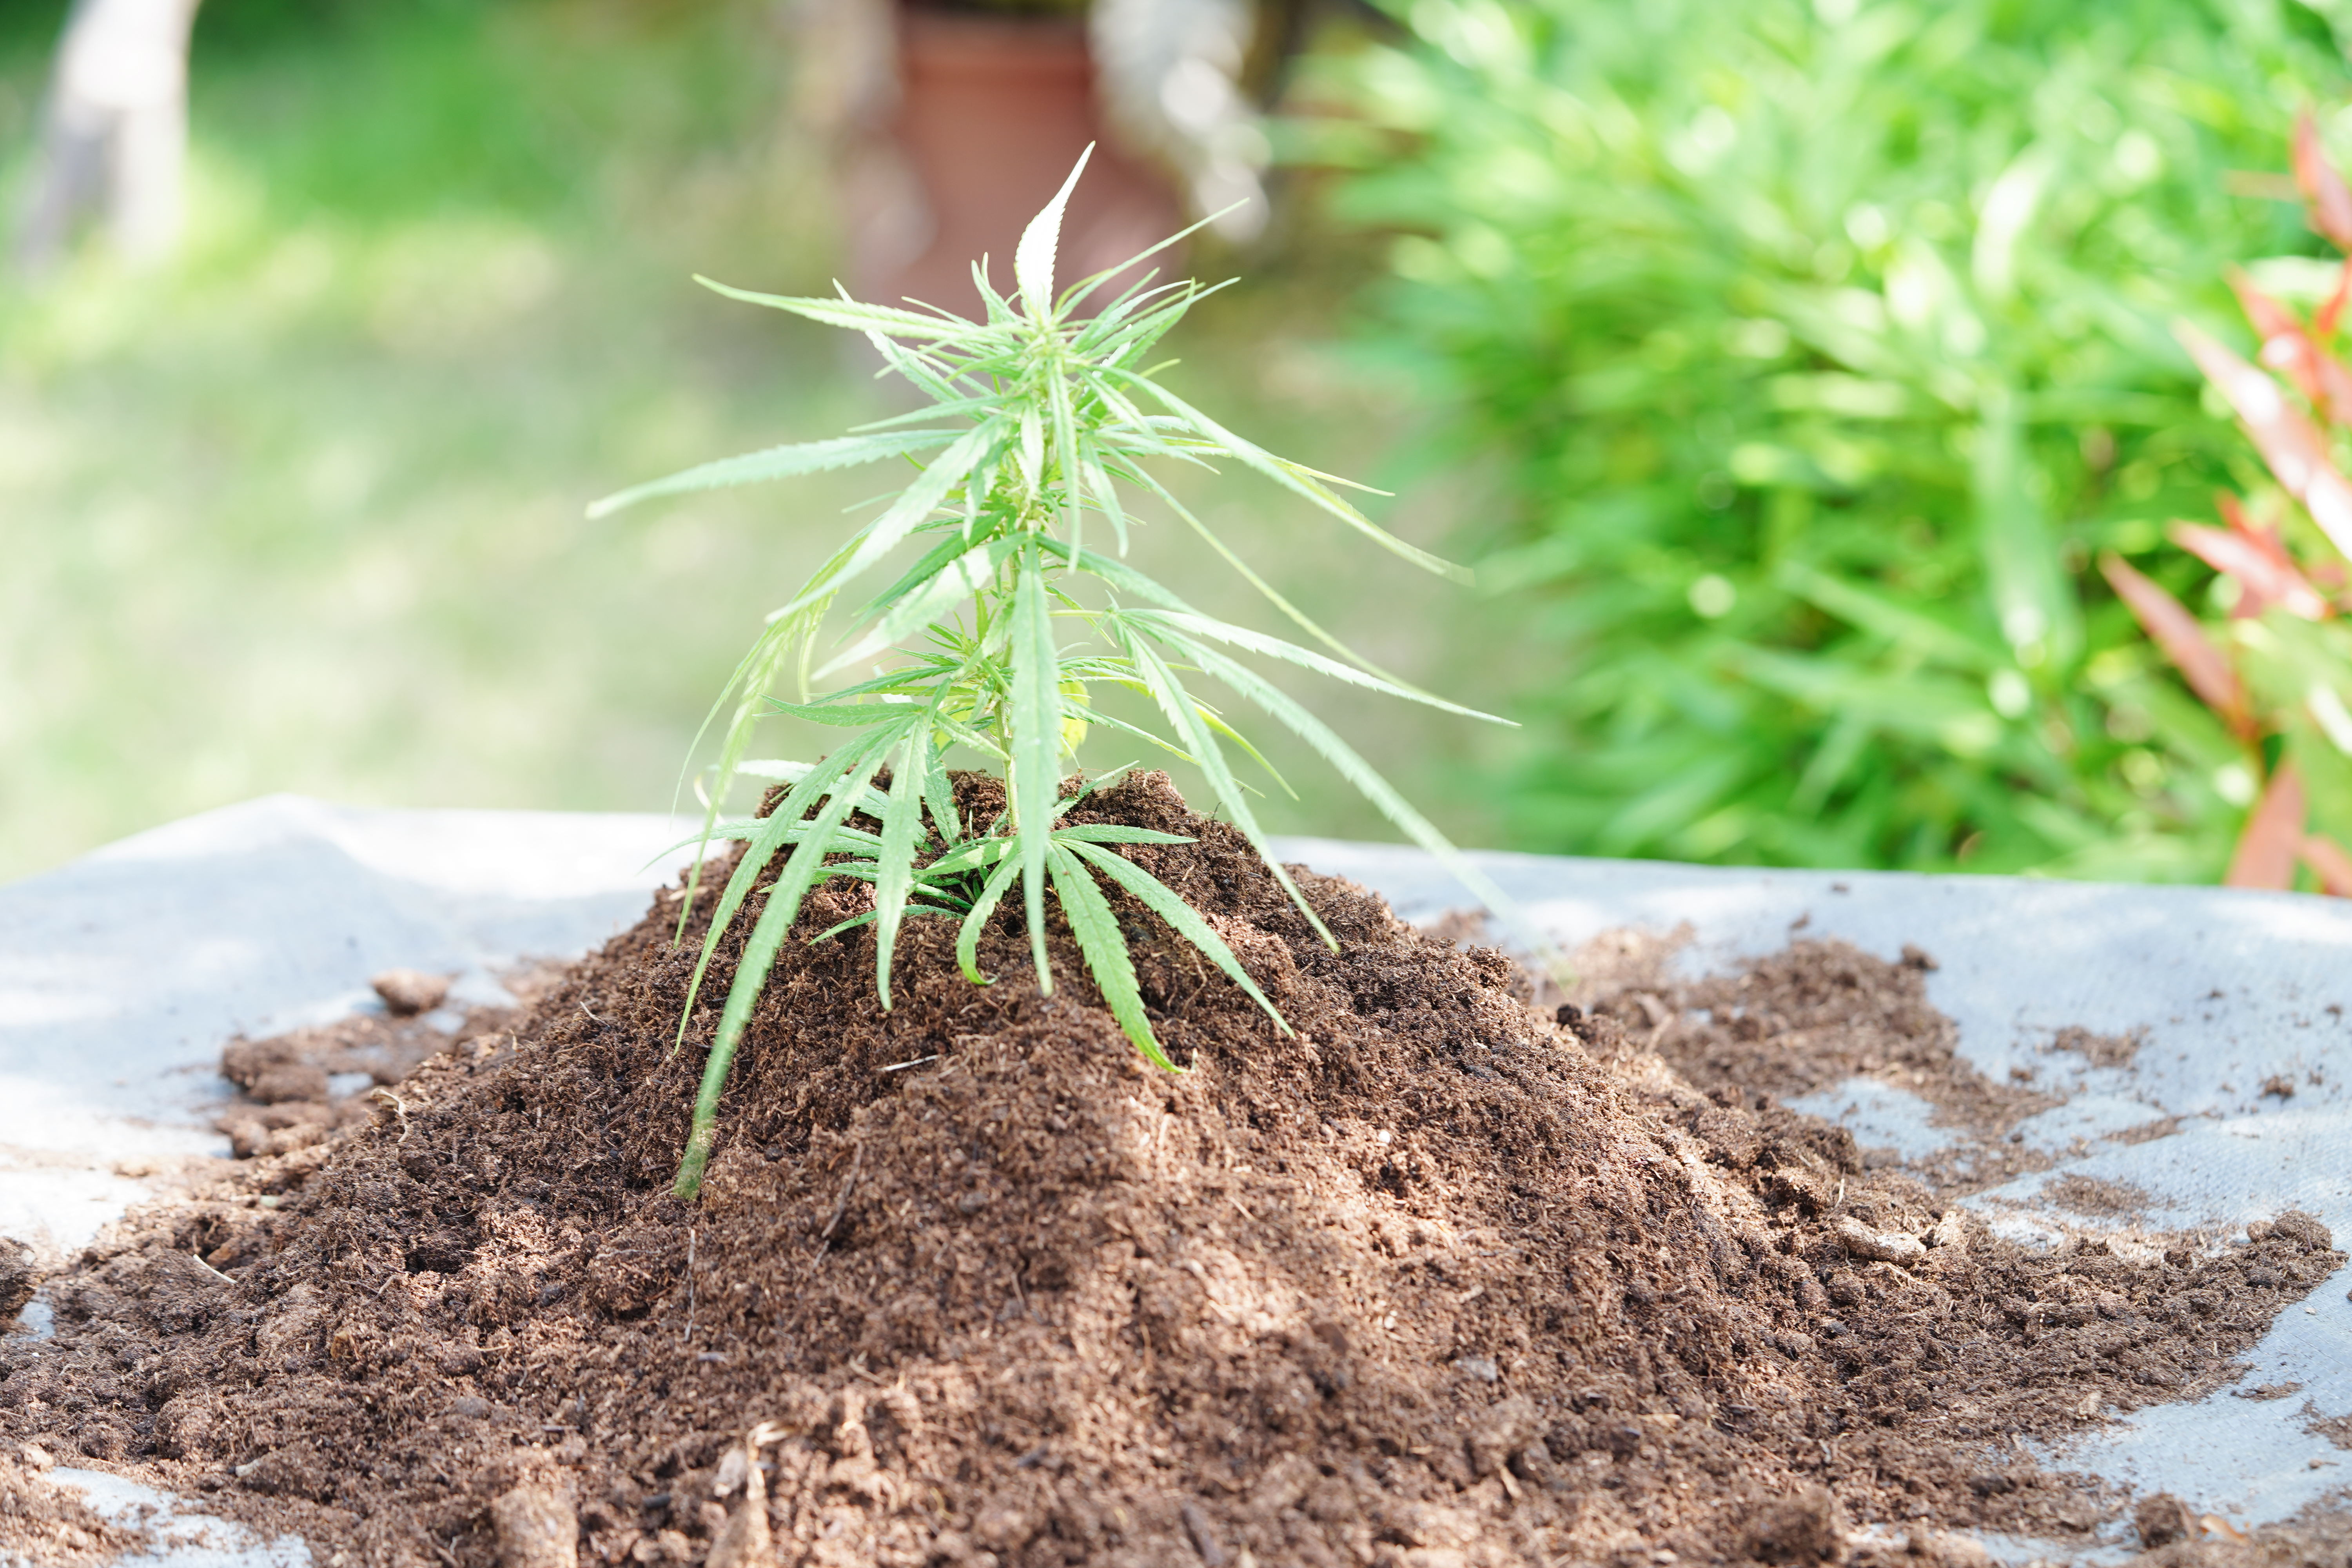


Healthy cannabis growth begins below the surface. Leaves, stems, and flowers may be the most visible parts of the plant, but roots support all of them. Roots take in water, oxygen, and nutrients from the growing medium. They also hold the plant in place as it becomes larger. Poor soil conditions can weaken the roots and reduce the plant’s ability to grow. A balanced cannabis soil mix creates a stable place where roots can spread and function well.
Cannabis soil mix is more than ordinary dirt. It is a blend of materials chosen to control drainage, airflow, moisture, and nutrient supply. A good mix usually contains a base material, organic matter, and an ingredient that creates air spaces. Peat moss, coco coir, compost, worm castings, perlite, and pumice are common examples. Each ingredient has a different purpose. The best mixture allows water to reach the roots without keeping them wet for too long.
Drainage is one of the most important features of cannabis soil. Water should move through the mixture at a steady rate. Soil that drains too slowly may stay wet for several days. Constant moisture can reduce the oxygen around the roots and increase the risk of root disease. It may also attract fungus gnats and other pests that prefer damp conditions. Soil that drains too quickly can create a different problem. It may dry before the roots have enough time to absorb water and dissolved nutrients. A useful soil mix balances these two needs.
Airflow within the soil is also important. Roots need oxygen to complete basic life processes. Heavy or compacted soil contains fewer open spaces for air. This can limit root growth and make it difficult for water to move through the container. Materials such as perlite, pumice, or rice hulls may help keep the mix loose. A light texture allows young roots to move through the soil more easily. Healthy root development can support stronger stems, steady leaf production, and later flower growth.
Moisture retention must be considered along with drainage. Cannabis plants need regular access to water, but they should not remain in saturated soil. Peat moss, coco coir, compost, and similar materials can hold moisture between watering sessions. The amount needed depends on the growing environment. Plants in warm, dry rooms may benefit from a mix that retains more water. Plants in cool or humid spaces may need faster drainage. Container size, airflow, plant age, and the material of the pot also affect how quickly soil dries.
The soil must also provide access to nutrients. Cannabis requires nitrogen, phosphorus, potassium, calcium, magnesium, sulfur, and several micronutrients. The amount needed changes during the plant’s life. Young seedlings need only a mild supply. Mature plants can use more nutrients because they have larger root systems and more plant tissue. However, rich soil is not always better. Too much fertilizer can damage root tips, burn leaves, and interfere with water uptake. A balanced mix provides enough nutrition without placing the plant under stress.
Soil pH affects whether the roots can use the nutrients that are present. Cannabis grown in soil generally performs well under slightly acidic conditions, often within a range of about 6.0 to 7.0. A pH level far outside this range can reduce access to certain nutrients. This condition is sometimes called nutrient lockout. The plant may show yellow leaves, spots, weak growth, or other deficiency signs even though fertilizer is present. Testing the soil and irrigation water can help identify pH problems before they become severe.
Organic matter supports both soil structure and biological activity. Mature compost and worm castings can add nutrients while helping the mixture hold water. They may also introduce beneficial microorganisms. These organisms break down organic materials and help make some nutrients available to roots. Living soil systems depend strongly on this biological activity. Other soil systems depend more on nutrients supplied through fertilizers. Both approaches require careful control of moisture, pH, drainage, and nutrient strength.
Garden soil, potting soil, and prepared cannabis soil mix are not the same. Garden soil contains natural mineral particles and organic matter, but it may become dense when placed in a pot. It may also carry weed seeds, pests, or disease organisms. Potting soil is made for container use and is usually lighter. However, some commercial products hold too much water or contain strong slow-release fertilizer. A prepared cannabis mix is adjusted to meet the root needs of cannabis plants. It may be purchased ready to use or made from separate ingredients.
No single recipe works perfectly in every setting. Indoor plants, outdoor plants, seedlings, autoflowers, and mature flowering plants may need different levels of moisture and nutrition. Climate also changes how a soil mix performs. A successful mixture must suit the plant, container, growing stage, and local conditions. Regular checks of soil moisture, drainage, pH, and plant appearance help growers make useful adjustments.
This guide explains how to choose ingredients, prepare a home soil recipe, improve drainage, manage pH, and provide nutrients without overfeeding. It also covers living soil, super soil, commercial potting mixes, seedling soil, autoflower soil, and soil reuse. These details can help create a healthy root zone that supports steady growth and stronger yields. Cannabis laws differ between locations, so growers should always confirm local rules before obtaining seeds or growing plants.
What Is the Best Soil Mix for Cannabis?
The best soil mix for cannabis gives the roots a steady supply of water, oxygen, and nutrients. It should feel light and loose when held in the hand. Water should pass through it without leaving the root zone dry too soon. The mix should also contain enough organic matter to support healthy growth.
There is no single soil recipe that works for every plant or growing space. Indoor and outdoor environments can have different temperatures, humidity levels, and watering needs. A young seedling needs milder soil than a large flowering plant. Container size and plant type also affect how the soil performs. However, every effective cannabis soil mix shares several basic qualities.
Qualities of a Healthy Cannabis Soil Mix
A healthy cannabis soil mix must have good drainage. Water should move through the soil and leave the container through open drainage holes. This movement helps prevent water from collecting around the roots. Soil that remains wet for too long may reduce oxygen levels and create conditions that support root disease.
Good soil must also hold some moisture. A mix that dries within a few hours may force the grower to water too often. Fast drying can place stress on the roots and cause sudden changes in nutrient levels. Peat moss, coco coir, compost, and worm castings can help hold moisture. Aeration materials such as perlite or pumice prevent these ingredients from making the mix too dense.
Air spaces are another important part of healthy soil. Roots need oxygen to stay active and absorb water. Compacted soil limits airflow and makes root growth more difficult. It may also prevent water from spreading evenly through the container. A loose mixture gives roots room to expand while allowing extra water to drain away.
The soil should contain a moderate amount of nutrients. Cannabis needs nitrogen, phosphorus, potassium, calcium, magnesium, and other elements. However, seedlings and young plants can be damaged by soil that contains too much fertilizer. Dark green leaves, burnt tips, and curled edges may be signs of excessive nutrients. A balanced soil provides gentle nutrition that can be increased as the plant grows.
Soil pH is also important because it affects nutrient access. Cannabis grown in soil generally prefers slightly acidic conditions. A pH range of about 6.0 to 7.0 is often suitable. Nutrients may become harder for the roots to absorb when the pH moves far outside this range. Regular testing can help detect a pH issue before it causes serious plant stress.
Healthy biological activity can improve an organic cannabis soil mix. Mature compost and worm castings may contain bacteria, fungi, and other small organisms. These organisms help break down organic matter. This process releases nutrients into forms that roots can use. Soil life also supports soil structure when moisture, temperature, and airflow remain suitable.
Why Loamy Soil Works Well
Loamy soil is often suitable for cannabis because it offers a useful balance of drainage and moisture retention. Natural loam contains sand, silt, clay, and organic matter. These parts work together to create a soil that is fertile but not too heavy.
Sand has large particles that create spaces for air and water movement. Silt has smaller particles and helps the soil hold water. Clay contains very small particles that hold nutrients and moisture. Organic matter improves soil structure and supports microorganisms. A balanced loam receives benefits from all these materials without being controlled by only one of them.
Sandy soil may drain too quickly and hold too few nutrients. Heavy clay soil may remain wet, compact easily, and restrict root growth. Silty soil may hold water well, but it can become dense when handled or watered often. Loamy soil reduces these problems because its different particle sizes create a more balanced structure.
Natural loam should still be tested before it is used for cannabis. Outdoor soil may contain pests, weed seeds, disease organisms, or chemical residue. It may also have an unsuitable pH or an uneven nutrient level. Placing heavy ground soil directly into a container can lead to compaction. Growers may need to add compost and an aeration material to improve its structure.
A prepared potting mix can copy many of the useful qualities of loam. Peat moss or coco coir can provide the base. Compost or worm castings can supply organic matter. Perlite, pumice, or rice hulls can create drainage and air spaces. The exact amounts can be adjusted to match the growing environment.
Signs of an Unsuitable Mix
Compacted texture is a common sign of unsuitable soil. Healthy soil should break apart when pressed gently. A hard block of soil can prevent roots from spreading and limit the movement of air. Compaction often becomes worse after repeated watering.
Slow drainage is another warning sign. Water that remains on the surface for a long time suggests that the soil has too few open spaces. A container that stays very heavy for several days may also be holding too much moisture. Constantly wet soil can lead to drooping leaves, slow growth, and unhealthy roots.
A foul or sour odor may show that the mix has remained wet without enough oxygen. Healthy soil often has a mild, earthy smell. Strong rotten odors may point to poor drainage, unfinished organic matter, or harmful microbial activity. Soil with a serious odor problem should be checked before a plant is placed in it.
Excessive fertilizer can also make a soil mix unsuitable. Some commercial potting soils contain strong time-release fertilizer. These products may continue releasing nutrients even when a plant shows signs of overfeeding. Soil should have a clear ingredient label so the grower knows what it contains.
Poor root development may become visible during transplanting. Healthy roots are usually firm and light in color. Brown, soft, or limited roots may result from excess moisture, compaction, disease, or poor drainage. The root problem should be identified before the same soil is used again.
The best soil mix for cannabis is loose, well drained, slightly acidic, and able to hold a moderate amount of moisture. It should contain enough nutrients to support growth without burning young roots. Loamy soil provides a useful model because it balances drainage, water retention, nutrient storage, and airflow. A prepared mix can create similar conditions through a combination of base material, organic matter, and aeration ingredients. Checking texture, drainage, odor, pH, and nutrient strength before planting can prevent many common soil problems.
What Ingredients Should Be in a Cannabis Soil Mix?
A cannabis soil mix needs several types of ingredients to support healthy roots. Each material should have a clear purpose. Some ingredients form the main body of the mix. Others improve drainage, hold moisture, add nutrients, or support soil organisms. Combining these materials in a balanced way creates better growing conditions than relying on one ingredient alone.
The exact mixture may change based on the plant’s age, the container, and the growing environment. Seedlings need a light mix with mild nutrient levels. Larger plants can use richer soil with more organic matter. Warm and dry growing spaces may need soil that holds more water. Cool or humid spaces often need faster drainage. Understanding each ingredient makes it easier to adjust the mix without creating serious problems.
Base Materials
Base materials make up most of a cannabis soil mix. They provide structure and help control the amount of water and air around the roots. Common base materials include peat moss, coco coir, aged compost, and commercial potting soil.
Peat moss is light and can hold a large amount of water. It also helps keep the soil loose when mixed with an aeration material. However, peat moss can become difficult to wet after it dries completely. It is naturally acidic, so the final soil pH may need to be checked and adjusted. Peat is also a slowly renewed natural material, which leads some growers to choose other options.
Coco coir is made from the outer husk of coconuts. It holds water while still allowing air to reach the roots. Coco can be used as part of a soil mix or as the main material in a soilless system. It should be rinsed and prepared before use because low-quality coco may contain excess salts. Some coco products are buffered with calcium and magnesium to improve their performance.
Aged compost can serve as part of the base while adding organic matter and nutrients. Good compost should have a dark color, loose texture, and mild earthy smell. It should not feel hot or smell like ammonia. Compost is usually mixed with other ingredients rather than used alone. Too much compost may make the soil heavy, hold excess water, or provide more nutrients than young plants need.
Commercial potting soil can also provide a useful base. The label should list the ingredients and any added fertilizer. A suitable product should feel light and drain well. Heavy garden soil is not the same as potting soil. Garden soil may become compacted inside containers and may carry pests, weed seeds, or disease organisms.
Aeration Materials
Aeration materials create open spaces within the soil. These spaces allow water to drain and oxygen to reach the roots. A base material without enough aeration can settle and become dense after repeated watering.
Perlite is one of the most common aeration ingredients. It is a lightweight, white material made from heated volcanic glass. Perlite does not add many nutrients, but it improves drainage and helps keep the soil loose. Fine perlite may rise to the surface during watering, so medium or coarse pieces are often easier to manage.
Pumice is another volcanic material. It is heavier than perlite and is less likely to float. Its rough surface creates air spaces and may provide places for microorganisms to live. Pumice can be useful in large containers or soil that will be reused. However, it may cost more and can be harder to find.
Rice hulls are a plant-based option. They improve airflow and drainage while slowly breaking down. Fresh rice hulls may not last as long as pumice or perlite, but they can work well in short growing cycles. Clean or parboiled rice hulls are preferred because untreated material may carry seeds or unwanted organisms.
Vermiculite holds both water and some nutrients. It can be helpful when a mix dries too quickly. However, it should be used carefully because too much vermiculite can cause the soil to retain excess moisture. It is not a direct replacement for perlite because the two materials behave differently.
Organic and Nutrient-Rich Ingredients
Organic ingredients can provide nutrients and support biological activity in the soil. Worm castings are a common choice because they contain mild nutrients and fine organic matter. They may improve moisture retention and introduce helpful microorganisms. Large amounts can make a mix dense, so worm castings are usually combined with a loose base and an aeration material.
Mature compost adds organic matter and a broad range of nutrients. Its quality can vary based on the materials and process used to make it. Compost made from clean plant waste is often easier to manage than compost that contains fresh manure. A careful grower should check its texture, smell, and source before adding it to a cannabis soil mix.
Kelp meal is made from dried seaweed. It supplies potassium and small amounts of trace elements. It is usually added in low amounts because it is an amendment, not a base material. Too much kelp meal may raise nutrient levels beyond what the plant can use.
Bone meal is rich in phosphorus and calcium. Blood meal contains a high level of nitrogen. Bat or seabird guano may contain nitrogen, phosphorus, or both, depending on the product. These materials can be strong. They release nutrients at different rates and may burn roots when used in excess. Product directions and soil testing can help reduce this risk.
Mineral amendments may provide calcium, magnesium, sulfur, and trace elements. Dolomite lime, gypsum, basalt rock dust, and similar products are common examples. Each one changes the soil in a different way. Dolomite lime can raise pH while adding calcium and magnesium. Gypsum adds calcium and sulfur without having the same effect on pH. Mineral products should not be added only because they appear in a recipe. The existing soil conditions must be considered first.
Choosing Clean, Mature Ingredients
Ingredient quality affects the safety and performance of the entire mix. Unfinished compost continues breaking down after it is placed in the soil. This process may create heat, release ammonia, or use oxygen that the roots need. Fresh manure can contain excessive nutrients, salts, weed seeds, and harmful organisms. Both materials should be fully composted before use.
Contaminated soil may carry pesticides, heavy metals, pests, or plant diseases. Outdoor soil taken from an unknown area can be difficult to test and may not be suitable for containers. Reliable products should have clear labels and storage instructions. Sealed bags should be checked for damage, foul odors, mold, or insects.
Dry ingredients can also create dust. Perlite, rock minerals, and powdered amendments should be handled in a well-ventilated space. Lightly moistening dusty materials before mixing may reduce particles in the air. Gloves and a suitable dust mask can provide added protection.
A balanced cannabis soil mix contains a base material, an aeration ingredient, and a controlled amount of organic matter or nutrients. Peat moss, coco coir, compost, and potting soil can form the base. Perlite, pumice, rice hulls, and vermiculite help manage air and moisture. Worm castings, compost, kelp meal, and mineral amendments can support plant nutrition when used carefully. Clean, mature ingredients are essential because contaminated soil, unfinished compost, and fresh manure may harm roots. Understanding the role of each material helps create soil that drains well, holds enough water, and supports steady cannabis growth.
How Do You Make Cannabis Soil Mix at Home?
Making cannabis soil mix at home gives the grower control over its texture, drainage, moisture level, and nutrient content. A homemade mix can also be adjusted for seedlings, mature plants, indoor rooms, or outdoor gardens. However, every ingredient must be measured carefully. Adding too much compost or fertilizer can make the soil heavy or cause nutrient burn.
A simple recipe is usually easier to manage than a mix containing many amendments. The soil should provide a loose structure, steady drainage, and moderate water retention. Nutrient levels can then be adjusted according to the plant’s age and condition. Before making a soil mix, confirm that home cannabis cultivation is allowed under local laws.
A Simple Beginner Soil Recipe
A basic cannabis soil mix can be made from three main parts. Use one part base material, one part mature organic matter, and one part aeration material. For example, a grower could combine equal amounts of peat moss or coco coir, mature compost or worm castings, and perlite or pumice.
A “part” is a unit of volume rather than a fixed amount. One part could be a small container, bucket, or scoop. The same measuring container should be used for every ingredient. If one bucket of coco coir is used, one bucket of organic matter and one bucket of aeration material would complete an equal-parts recipe.
Some compost is rich and dense, so a full third may be too strong for young plants. A milder mix can contain about 40 percent base material, 30 percent aeration material, and 30 percent compost or worm castings. Seedling soil may need even less organic matter. The exact balance depends on the strength and texture of the ingredients.
Place the materials on a clean surface or in a large container. Break apart any hard pieces before mixing. Turn the materials several times until the color and texture look even. Pockets of compost or fertilizer can expose some roots to stronger nutrient levels than others.
Peat moss and dry coco may produce dust. Lightly moistening these materials before mixing can make them easier to handle. A mask and gloves may also be useful when working with dusty materials such as perlite or mineral powder.
Preparing a Nutrient-Rich Mix
Mature cannabis plants may need more nutrients than a basic soil mix provides. Organic amendments can be added to create a richer mixture, but they must be measured with care. Suitable amendments may include worm castings, kelp meal, bone meal, blood meal, gypsum, or other products made for container plants.
Nitrogen supports green growth during the vegetative stage. Phosphorus is involved in root growth, energy transfer, and flower development. Potassium helps regulate water movement and supports several plant processes. Calcium and magnesium are also important for cell growth, enzyme activity, and leaf health.
Organic amendments release nutrients at different rates. Blood meal can supply nitrogen quickly, while bone meal usually releases phosphorus more slowly. Kelp meal provides potassium and trace elements. Gypsum supplies calcium and sulfur without strongly raising soil pH. Dolomite lime adds calcium and magnesium, but it may also raise pH.
More fertilizer does not always produce faster growth or larger yields. A soil mix that is too rich can burn roots, darken leaves, and cause curled tips. High nutrient levels can also make it difficult for the plant to take in water. Strong soil is especially risky for seedlings and newly rooted plants.
Follow the product label when using packaged amendments. Different products have different strengths, so a measurement from one recipe may not work for another brand. Soil testing can provide more useful information than guessing. A mild mixture can be supplemented later, while a heavily fertilized mix is harder to correct.
A nutrient-rich mix can also be placed in the lower part of a container. Milder soil can be placed around the young plant. The roots reach the richer layer after they have grown larger. This method reduces direct contact between sensitive young roots and strong amendments. However, the soil should still be mixed enough to prevent highly concentrated pockets.
Moistening and Resting the Mix
Dry ingredients do not always mix or react evenly. After combining the materials, slowly add clean water while turning the soil. The goal is to make the entire mixture damp without soaking it.
A simple hand test can help check the moisture level. Squeeze a handful of soil gently. It should hold its shape for a moment and then break apart when touched. Water should not pour from the handful. If the mix falls apart at once and produces dust, it is probably too dry. If it feels muddy or releases water, it is too wet.
A basic mix without strong amendments may be ready to use after it is evenly moistened and tested. A heavily amended organic mix often needs time to rest. This resting period is sometimes called cooking, although no heat source is used. Microorganisms begin breaking down organic materials during this time.
The mixture may become warm during the first part of the resting period. Warmth can show that biological activity is taking place. The soil should not be used around roots while it feels hot. Keep it damp and turn it from time to time so air can move through the material.
A rich organic mix may need several weeks to become stable. The exact time depends on the ingredients, moisture level, and temperature. Keep the mixture in a covered container or protected pile, but allow some airflow. It should not be sealed while it is warm and active. The soil should smell earthy rather than sour, rotten, or strongly like ammonia.
Testing Before Planting
Testing the finished soil can prevent problems after planting. Start by checking the texture. The mix should feel loose and should break apart easily. It should not form a hard, sticky lump when squeezed.
A drainage test can be done by filling a small pot with the mix and watering it slowly. Water should soak into the surface and begin leaving through the drainage holes. Long-lasting puddles on top may show that the mix is too dense. Water that passes through almost at once may show that the soil holds too little moisture.
Check how the soil feels after a day or two. It should become lighter as it dries, but it should not shrink into a hard block. If it remains wet for several days under normal conditions, more aeration material may be needed.
The pH of the mix should also be tested. Cannabis grown in soil generally performs well at a slightly acidic pH of about 6.0 to 7.0. A laboratory soil test can provide the most complete information. A calibrated digital meter or soil slurry test may also provide a useful estimate.
An unfamiliar homemade recipe can be tested with one small plant before it is used for an entire crop. Watch for burnt leaf tips, unusual yellowing, slow growth, drooping, or poor drainage. A small trial makes it easier to correct the mixture without placing every plant at risk.
Homemade cannabis soil should combine a stable base, mature organic matter, and enough aeration material. A simple mixture is easier to test and adjust than a recipe with many strong amendments. Nutrient-rich ingredients must be measured carefully because excessive fertilizer can damage roots. The finished mix should be moistened evenly, and heavily amended soil should rest until it becomes cool and stable. Testing its texture, drainage, moisture retention, pH, and effect on a small plant can help confirm that the soil is ready for use.
What Is the Correct pH for Cannabis Soil?
Soil pH is a measure of how acidic or alkaline the growing medium is. The pH scale runs from 0 to 14. A value of 7 is neutral. Values below 7 are acidic, while values above 7 are alkaline. Small changes on this scale can have a strong effect on nutrient availability.
Cannabis roots can only use nutrients when the soil conditions allow them to do so. A soil mix may contain enough fertilizer, but the plant may still develop yellow leaves, brown spots, or weak growth if the pH is unsuitable. Managing pH does not mean holding it at one exact number every day. The main goal is to keep it within a healthy range and avoid sudden changes.
The Preferred Soil pH Range
Cannabis grown in soil generally performs well at a pH between 6.0 and 7.0. Many growers aim for a narrower range of about 6.2 to 6.8. This slightly acidic range allows the roots to reach most of the nutrients needed for healthy growth.
The best pH target may change slightly based on the type of soil mix. A mix containing compost and other organic materials may have some natural buffering ability. Buffering helps the soil resist sudden changes in pH. A light mix made mostly from peat or coco may respond more quickly to the pH of the irrigation water and fertilizer.
Coco coir is often managed more like a soilless growing medium than a true soil. A coco-heavy mix may require a lower pH than compost-rich potting soil. Growers should identify their growing medium before choosing a target. Treating every mix in the same way can lead to incorrect adjustments.
The pH does not need to remain at one fixed value. A small amount of movement within the correct range may help make different nutrients available. Problems are more likely when the soil stays below 6.0 or above 7.0 for a long period.
How pH Affects Nutrient Availability
Soil pH changes the chemical form of nutrients. Some forms dissolve easily in water and can be absorbed by roots. Other forms become difficult for the plant to use. This is why pH affects plant health even when fertilizer is present.
Nitrogen supports leaf and stem growth. Phosphorus helps with root development, energy movement, and flowering. Potassium supports water control and many other plant functions. Calcium, magnesium, iron, manganese, zinc, and other elements are also needed in smaller or moderate amounts.
Low soil pH can reduce access to some nutrients while increasing the availability of others to harmful levels. Calcium, magnesium, and phosphorus may become harder for the plant to use under very acidic conditions. Some metals may become more available and reach levels that can damage roots.
High soil pH can limit iron, manganese, zinc, phosphorus, and other nutrients. Iron problems often cause the newest leaves to turn pale or yellow while the veins remain greener. Magnesium problems may cause yellowing between the veins of older leaves. These signs can also have other causes, so leaf color alone cannot confirm a pH problem.
Nutrient lockout occurs when the roots cannot absorb nutrients that are already present. Adding more fertilizer may make the problem worse. Extra fertilizer can increase salt levels and place more stress on the roots. Testing the soil pH, water, and nutrient strength is a better first step than feeding the plant again without evidence.
How to Test Soil pH
Several methods can be used to test pH. A laboratory soil test provides the most complete information. It may report pH, nutrient levels, organic matter, and other soil features. This type of test is useful when preparing outdoor soil or diagnosing a problem that continues after basic corrections.
A digital pH meter can provide quick readings, but it must be used correctly. The probe should be cleaned and calibrated according to the manufacturer’s directions. Calibration uses special solutions with known pH values. A meter that has not been calibrated may give a reading that looks exact but is not accurate.
A soil slurry test is another option. A small sample of soil is mixed with distilled water and allowed to rest. The liquid portion is then tested with a calibrated meter or suitable test kit. The same soil-to-water ratio should be used each time so results can be compared.
Runoff water can also be tested after irrigation. This method may provide a general sign of what is happening in the container. However, runoff does not always show the exact pH near every root. Water may follow channels through the soil and miss some areas. Fertilizer salts in the runoff can also affect the result.
Testing the irrigation water before adding nutrients is useful. The solution should be tested again after fertilizer or other products are mixed into it. Some nutrients can change pH. Keeping a written record of water pH, soil pH, feeding, and plant symptoms can help identify patterns.
Correcting High or Low pH
A pH problem should be corrected slowly. Large and rapid changes can stress roots and disturb soil organisms. The first step is to confirm the reading with a clean and calibrated testing method. Testing more than one soil sample may show whether the issue affects the entire container.
Low pH means the soil is too acidic. Agricultural lime or dolomite lime can raise soil pH. Dolomite also supplies calcium and magnesium. However, it should not be added without checking whether those nutrients are needed. Too much lime can push the pH too high and may create a new nutrient imbalance.
High pH means the soil is too alkaline. Elemental sulfur and certain acid-forming amendments may lower soil pH over time. These materials do not act at the same speed. Soil microorganisms must process elemental sulfur, so the change may take weeks or months. Strong acids can change water pH quickly, but they require careful measurement and safe handling.
Organic materials may also affect pH, but they are not instant solutions. Peat moss is acidic and may help lower the pH of a new soil mix. Compost can help buffer pH, although its exact effect depends on its source. Adjustments should be based on test results rather than general assumptions.
Irrigation water can slowly change soil pH. Water with high alkalinity may continue pushing the soil upward even if its pH reading does not seem very high. Alkalinity describes the amount of acid-neutralizing material in the water. Persistent pH problems may require a water test rather than repeated soil treatments.
Cannabis grown in soil generally prefers a slightly acidic pH between 6.0 and 7.0. A range near 6.2 to 6.8 often supports access to many important nutrients. Soil pH that remains too high or too low can cause nutrient lockout, weak growth, and leaf discoloration. Reliable testing should come before adding more fertilizer or making a correction. Digital meters require regular calibration, while laboratory tests provide more detailed information. Any pH adjustment should be made slowly and followed by further testing. Stable soil conditions are safer for roots than frequent, large changes.
How Can You Improve Drainage and Aeration?
Drainage and aeration are two of the most important parts of a healthy cannabis soil mix. Drainage controls how quickly extra water leaves the soil. Aeration refers to the open spaces that allow oxygen to reach the roots. These two features work together. Soil that drains well usually contains more air, while compacted soil often holds too much water.
Cannabis roots need both moisture and oxygen. A soil mix should hold enough water for the plant to use, but it should not remain soaked for long periods. Poor drainage may slow growth, weaken roots, and increase the risk of disease. A few changes to the soil mix and container can improve conditions around the roots.
Why Roots Need Oxygen
Roots are living parts of the plant. They take in water and nutrients, but they also need oxygen for respiration. Respiration releases the energy that root cells need to grow and complete other basic functions. A steady oxygen supply helps roots remain active and supports nutrient uptake.
Water fills many of the open spaces in soil after irrigation. Extra water should drain away so air can return to those spaces. If the soil remains saturated, the roots receive less oxygen. This condition can cause slow growth even when the plant has enough light and nutrients.
Low oxygen levels can also affect helpful soil organisms. Many beneficial bacteria and fungi need oxygen. They help break down organic matter and release nutrients. Poor airflow may support other organisms that produce sour odors and damage roots.
Drooping leaves are a common sign of excess water, but they do not always prove that the plant has been overwatered. Heat, drought, root damage, and other problems can also cause drooping. The soil should be checked before more water is added. A container that stays heavy for several days may have poor drainage.
Healthy roots are often firm and light in color. Roots damaged by wet conditions may turn brown, feel soft, or develop an unpleasant smell. Fixing the soil structure is important because changing the watering schedule alone may not solve severe compaction.
Amendments That Improve Drainage
Perlite is widely used to improve drainage. It is lightweight and contains many small spaces. Mixing perlite throughout the soil prevents the smaller particles from packing tightly together. Medium or coarse perlite usually creates better air spaces than very fine material.
Pumice provides similar benefits, but it is heavier and more stable. It does not float to the surface as easily during watering. Pumice can be useful in large containers and reusable soil. Its rough surface may also provide a place for beneficial microorganisms.
Rice hulls are another option. They create air spaces and help water move through the mix. Rice hulls slowly break down, so their effect may decrease over time. Clean or parboiled hulls are safer than untreated material because they are less likely to contain seeds or pests.
Coarse coco fiber can separate dense soil particles while holding some moisture. Fine coco holds more water, so the particle size matters. A mixture that already stays wet may benefit more from coarse fiber than fine coco.
Aged pine bark or another clean, composted bark can also improve structure. Larger bark pieces create open spaces and reduce compaction. Fresh bark should be avoided because it may use nitrogen as it breaks down. Bark from unknown or treated wood may contain unwanted chemicals.
The correct amount of aeration material depends on the other ingredients. A dense mix containing large amounts of compost may need more perlite or pumice. A light potting mix may need less. Many container mixes contain about 20 to 30 percent aeration material, but the final texture should guide the decision.
Testing Drainage Before Planting
A simple drainage test can reveal problems before a cannabis plant is placed in the soil. Fill a small container with the prepared mix. Do not press the soil down firmly. Gentle tapping is enough to settle it without destroying the air spaces.
Slowly add water across the surface. The water should soak into the soil rather than sit on top for a long time. It should begin leaving through the drainage holes after the mix becomes evenly wet. A brief pause before drainage is normal, especially if the soil was dry.
Water that remains on the surface may show that the mix is compacted or water-repellent. Dry peat can resist water at first. Slow and even watering may help it absorb moisture. If the problem continues after the peat is moist, more aeration material may be needed.
Water that runs straight through the pot may show that the mix is too loose or very dry. It can also mean that channels have formed around the sides of the container. Water moving through these channels may leave much of the root zone dry.
Check the container again after one or two days. A useful soil mix should become lighter as moisture leaves. It should not remain soaked for many days under normal growing conditions. The soil should also stay loose rather than forming a hard block.
Containers and Drainage Holes
The container affects how well the soil drains. Every pot should have enough open holes at the bottom. Small or blocked holes can trap water. Roots, soil particles, and mineral deposits may block drainage over time, so the bottom of each container should be checked.
Adding a thick layer of rocks to the bottom does not always improve drainage. It can reduce the amount of soil available for roots and create a wet area above the rocks. A well-mixed growing medium and clear drainage holes are usually more effective.
Fabric pots allow air to move through their sides. This can help the soil dry more evenly and may reduce root circling. However, fabric containers may dry quickly in hot or windy areas. Plastic pots retain moisture longer but need good drainage holes.
Saucers can catch runoff and protect floors, but containers should not remain in standing water. Trapped water can move back into the soil and keep the roots wet. Emptying the saucer after watering helps protect drainage.
Raising a pot slightly above the floor can keep the drainage holes open. A small stand or rack allows runoff to escape and air to move under the container. Outdoor pots should be placed where rainwater cannot collect around their bases.
Good drainage removes extra water, while good aeration supplies oxygen to cannabis roots. Perlite, pumice, rice hulls, coarse coco fiber, and aged bark can improve soil structure. The amount used should match the density and moisture level of the base mix. Testing drainage before planting can reveal slow absorption, compaction, or water channeling. Containers also need open drainage holes and should never remain in standing runoff. A loose, well-drained soil mix helps roots breathe, absorb nutrients, and support steady plant growth.
How Much Nutrient Content Should Cannabis Soil Have?
Cannabis soil should contain enough nutrients to support steady growth, but it should not be overloaded with fertilizer. The correct nutrient level depends on the age of the plant, the size of its root system, the type of soil, and the growing environment. Seedlings need very little nutrition, while mature plants can use more.
Nutrients do not work alone. Soil pH, moisture, temperature, and root health affect how well a cannabis plant can absorb them. Adding more fertilizer will not correct poor drainage, damaged roots, or an unsuitable pH. A balanced approach is safer than using strong nutrients without first checking the soil and plant.
Nutrients Needed for Plant Growth
Cannabis needs several nutrients to complete its life cycle. Nitrogen, phosphorus, and potassium are called primary nutrients because plants use them in relatively large amounts. Fertilizer labels often show these nutrients as three numbers called the NPK ratio.
Nitrogen supports the development of leaves, stems, and chlorophyll. Chlorophyll helps the plant capture light and produce energy. A nitrogen shortage may cause older leaves to turn pale or yellow. Too much nitrogen can produce very dark leaves, weak stems, or downward-curled leaf tips.
Phosphorus supports root development, energy transfer, and flower formation. A true phosphorus shortage may cause slow growth, dark leaves, or unusual leaf color. However, these signs may also appear when the root zone is cold or the pH is incorrect. Adding phosphorus without testing can create an imbalance.
Potassium helps control water movement within the plant. It also supports enzyme activity, plant strength, and stress response. A shortage may cause yellow or brown edges on older leaves. Excess potassium may reduce the plant’s ability to absorb calcium, magnesium, and other nutrients.
Cannabis also needs calcium, magnesium, and sulfur. Calcium supports strong cell walls and new growth. Magnesium is part of the chlorophyll molecule and is needed for photosynthesis. Sulfur helps form proteins and enzymes.
Micronutrients are needed in smaller amounts, but they are still essential. These include iron, manganese, zinc, copper, boron, molybdenum, chlorine, and nickel. A high-quality soil mix or complete fertilizer usually provides these elements. Adding separate micronutrient products without evidence may increase the risk of toxicity.
Nutrient Needs During Different Growth Stages
Seedlings have small roots and limited nutrient needs. The energy stored inside the seed supports the plant during its first days of growth. A light soil mix with mild nutrition is often enough during this stage. Rich compost, strong manure, or concentrated fertilizer may burn new roots.
Seed leaves, also called cotyledons, may become pale and fall away after the first true leaves develop. This is often a normal part of growth. It does not always mean the plant needs immediate feeding. The condition of the true leaves and the speed of growth provide more useful information.
The vegetative stage begins when the plant is producing new leaves, branches, and roots at a faster rate. Nitrogen is important during this period because it supports green growth. Calcium, magnesium, potassium, and the other essential nutrients are also needed. Balanced nutrition is more useful than giving a very high dose of one element.
Nutrient demand often increases as the plant becomes larger. A small plant in a large volume of rich soil may not need extra fertilizer for several weeks. A large plant in a small container may use the available nutrients much sooner.
The flowering stage changes the plant’s growth pattern. Cannabis still needs nitrogen, but the amount is usually lower than during rapid vegetative growth. Phosphorus and potassium remain important, but very large doses do not guarantee bigger flowers. Excess fertilizer during flowering can damage roots, burn leaves, and increase salt buildup.
Late in the plant’s life, some older leaves may fade as nutrients move to newer tissues. Early or rapid yellowing can still point to a problem. Plant age, pH, watering, root condition, and nutrient supply should all be checked before making a correction.
Understanding “Hot” Soil
“Hot” soil is a common term for a mix that contains high levels of available nutrients. It does not always refer to temperature. Some commercial soils and homemade super soils are rich enough to feed mature plants for a long period. The same soil may be too strong for seedlings or young transplants.
Burnt leaf tips are one of the first signs of excessive nutrients. The tips may turn yellow, brown, or dry. Leaves may become very dark green and curl downward. Growth may slow even though the soil contains a large amount of fertilizer.
High nutrient levels can also increase the concentration of dissolved salts around the roots. This makes it harder for roots to take in water. A plant in wet soil may appear thirsty because the root zone is chemically unbalanced.
Hot soil is difficult to correct after a plant has been placed in it. Adding more water may help remove some soluble fertilizer, but repeated heavy watering can reduce oxygen and damage roots. Transplanting into a milder mix may be necessary in severe cases, although transplanting can also cause stress.
Preventing the problem is safer. Seedlings can be started in a light mix and moved into richer soil after their roots have developed. Another method is to place mild soil around the plant and richer soil deeper in the final container.
When Supplemental Feeding May Be Needed
Supplemental feeding may be needed when the nutrients in the soil begin to run low. The timing depends on the type of mix. A lightly fertilized potting soil may need support sooner than a rich organic mix. Product labels can provide a general guide, but plant condition should also be observed.
Container size affects nutrient supply. A large container holds more soil and may provide nutrients for a longer period. A small container has less stored nutrition and may require more frequent watering and feeding.
Watering practices also affect nutrient levels. Heavy runoff can wash soluble nutrients from the container. Poor drainage may keep nutrients around the roots for too long. Hard water may supply calcium and magnesium, while very soft or purified water may provide little of either.
A soil or growing-medium test can help determine whether nutrients are low or excessive. Electrical conductivity, often called EC, provides an estimate of dissolved salt levels. High EC may show that fertilizer has built up. Low EC may suggest that the soil contains little available nutrition, although the result must be considered with plant health and pH.
Feeding should begin with a mild dose when the soil already contains nutrients. Changes should be made one at a time. This makes it easier to see how the plant responds. Written records of feeding strength, pH, watering, and symptoms can prevent repeated mistakes.
Cannabis soil should contain a balanced supply of primary nutrients, secondary nutrients, and micronutrients. Seedlings need mild soil, while larger plants may require more nutrition as their roots and leaves develop. Rich or “hot” soil can burn young roots and cause dark leaves, dry tips, and slow growth. Supplemental feeding may become necessary when a plant uses the nutrients stored in the soil. Plant age, container size, watering, pH, and root health should be checked before fertilizer is added. Careful feeding supports steady growth and reduces the risk of nutrient burn or lockout.
Can You Use Regular Potting Soil for Cannabis?
Regular potting soil can be used for cannabis if it has the right texture, drainage, pH, and nutrient content. However, not every product sold as potting soil is suitable. Some mixes stay wet for too long, while others contain strong fertilizers that may damage young plants. The label and physical condition of the product should be checked before use.
Potting soil is designed for containers, even though many products contain little or no natural soil. A typical mix may include peat moss, coco coir, aged bark, compost, perlite, and fertilizer. These materials can create a light growing medium that supports root development. Garden soil is different because it contains mineral particles and may become dense inside a pot.
A grower does not always need a product labeled for cannabis. A high-quality general potting mix can work when it provides the conditions that cannabis roots need. It may also be improved with extra aeration or mild organic matter.
Evaluating Commercial Potting Mix
The ingredient list is the first place to look when choosing commercial potting soil. A clear label should identify the base materials, aeration ingredients, and added fertilizers. Peat moss, coco coir, aged bark, perlite, pumice, mature compost, and worm castings are common ingredients.
The texture should feel loose and light. A handful of moist mix should hold its shape for a short time when gently squeezed. It should then break apart easily when touched. Soil that stays in a hard lump may become compacted around the roots. A mix that feels very fine or muddy may also hold too much water.
Drainage should be tested before planting. Fill a small container with the mix and add water slowly. Water should soak into the surface and leave through the drainage holes after the soil becomes wet. A long-lasting puddle on top may show that the mix is too dense. Water that passes straight through may show that the soil is too dry, too loose, or pulling away from the sides of the pot.
Commercial potting mixes vary in pH. Many products are adjusted for a wide range of container plants, but the actual pH may change during storage or use. Cannabis grown in soil generally prefers a slightly acidic pH between about 6.0 and 7.0. Testing a new product can reduce the risk of nutrient lockout.
The amount of fertilizer in the mix also matters. Some products contain only enough nutrients to support plants for a short period. Others contain slow-release fertilizer that may continue feeding for several months. A clear label should state whether fertilizer is present and how long it is expected to last.
Storage conditions can affect quality. A bag that has been left in heavy rain or direct heat may develop mold, pests, or uneven moisture. The mix should have a mild, earthy smell. A sour, rotten, or strong ammonia odor may point to poor storage or unfinished organic matter.
Potting Mix Ingredients to Avoid
Moisture-control products can be difficult to manage for cannabis. Some contain materials that absorb and hold large amounts of water. This may help certain houseplants, but it can keep the cannabis root zone wet for too long. The risk is greater in cool or humid rooms where evaporation is slow.
A heavy mix with little aeration should also be avoided. Soil that contains no visible perlite, pumice, bark, or similar material may become compacted after repeated watering. Dense soil reduces oxygen around the roots and slows drainage.
Strong slow-release fertilizers may create problems because the grower cannot easily control when nutrients are released. Temperature and moisture can affect the release rate. A warm and wet container may receive more fertilizer than expected. Adding liquid nutrients to an already fertilized mix can cause nutrient burn.
Products with an unclear ingredient list should be treated with care. It is difficult to adjust a soil mix when its base materials and fertilizer content are unknown. Clear labeling helps the grower decide whether extra aeration or nutrition is needed.
Fresh manure and unfinished compost should not be present in container soil. These materials may release too much nitrogen, create heat, or contain harmful salts. They may also carry weed seeds or disease-causing organisms.
Potting soil that contains visible pests, thick mold, or slimy material should not be used. Small amounts of harmless surface fungi may appear in organic mixes, but a damaged bag with a strong odor or active pest problem presents a greater risk.
How to Improve Basic Potting Soil
A basic potting soil can often be improved by adding an aeration material. Perlite and pumice are common choices. Rice hulls or coarse coco fiber may also help. The amount needed depends on the original texture.
A mix that remains wet for several days may need 20 to 30 percent aeration material by volume. Very dense soil may need more. The final mixture should feel loose without becoming so open that water runs through it too quickly.
Mature compost or worm castings can add organic matter and mild nutrients. These ingredients should be used in moderate amounts. Too much compost may make the mix dense or raise nutrient levels beyond what seedlings can handle.
The soil should be mixed thoroughly before planting. Uneven pockets of fertilizer, compost, or perlite can create different conditions within the same container. Turning the mix several times helps spread each ingredient.
Testing should follow any change. Check the texture, drainage, moisture retention, and pH. A new or heavily changed mix can be tested with one small plant before it is used for several containers.
The watering schedule may also need to change. A potting mix with extra perlite may dry faster than it did before. A mix containing more compost or coco may hold moisture longer. Watering should be based on the condition of the soil rather than a fixed calendar.
Potting Soil Versus Garden Soil
Garden soil should not be treated as a direct replacement for potting mix. Natural ground soil contains sand, silt, clay, minerals, and organic matter. Its structure can work well outdoors because roots, insects, and natural weather help maintain it.
The same soil may become hard and compacted inside a container. Clay-rich garden soil can hold too much water. Sandy soil may drain quickly and lose nutrients. Outdoor soil may also contain pests, weed seeds, chemical residue, or disease organisms.
Garden soil can sometimes be used as one part of an outdoor mixture after testing and improvement. However, using a prepared potting mix is often simpler for container-grown plants. Its light texture makes drainage, watering, and root growth easier to manage.
Regular potting soil can support healthy cannabis growth when it is light, well drained, slightly acidic, and not overloaded with fertilizer. The label should provide clear information about its ingredients and nutrient content. Heavy soil, moisture-control products, fresh manure, unclear fertilizers, and pest-filled mixes should be avoided. Basic potting soil can often be improved with perlite, pumice, mature compost, or worm castings. Every change should be followed by drainage and pH testing. A balanced commercial mix can provide a useful base without needing a special cannabis label.
What Is the Difference Between Living Soil, Super Soil, and Regular Soil?
Living soil, super soil, and regular potting soil can all support cannabis growth. However, they do not work in the same way. The main differences involve nutrient sources, biological activity, preparation, and daily plant care.
Regular potting soil often provides a physical place for roots to grow. Nutrients may come from fertilizer added during production or feeding after planting. Super soil contains a stronger supply of organic amendments that release nutrients over time. Living soil relies on both organic materials and an active community of microorganisms.
None of these systems removes the need for careful watering, suitable pH, and good drainage. A poorly managed living soil can still become waterlogged. A rich super soil can burn young roots. Regular potting soil can also support healthy plants when its structure and nutrient supply are managed correctly.
Regular Potting Soil
Regular potting soil is a prepared growing medium made for container plants. Despite its name, many products contain little natural ground soil. Peat moss, coco coir, aged bark, compost, perlite, and vermiculite are common ingredients.
The main purpose of potting soil is to give roots a stable structure. A suitable mix should hold some water while allowing extra moisture to drain. It should also contain open spaces for oxygen. These features are important whether the product is used for cannabis, vegetables, flowers, or houseplants.
Some potting soils contain a small starter supply of nutrients. Others include slow-release fertilizer that may feed plants for several weeks or months. The grower may need to add liquid or dry nutrients after the original supply begins to run low.
Regular potting soil is often easier for beginners because its nutrient content may be listed on the package. However, products vary widely. A mix made for moisture-loving houseplants may stay wet for too long. Strong time-release fertilizer can also make cannabis feeding difficult to control.
A basic potting mix does not need to be free of biological life. Compost and bark naturally carry microorganisms. Still, regular potting soil is not always designed to maintain a large and active soil food web. Its main role is often to hold roots, water, air, and added nutrients.
Super Soil
Super soil is a rich organic mixture designed to provide nutrients over an extended period. It usually begins with a base such as peat moss, coco coir, or potting soil. Compost, worm castings, aeration material, and several dry amendments are then added.
Common amendments may include kelp meal, bone meal, blood meal, fish meal, bat guano, gypsum, lime, and mineral dust. The exact recipe can vary. Each material supplies different nutrients and may release them at a different rate.
A freshly mixed super soil is often too strong to use right away. It normally needs a resting period so microorganisms can begin breaking down the organic materials. The soil should be kept slightly moist and allowed to breathe during this time. It may become warm while biological activity is high.
Super soil should be cool, stable, and earthy-smelling before use. Hot, sour, or ammonia-smelling soil may contain unfinished organic matter. Placing roots into an unstable mix can cause damage.
Young plants are sensitive to strong soil. A common method is to place super soil in the bottom part of the container and fill the upper area with a milder mix. The young roots begin in gentle soil. They reach the richer layer after the plant becomes larger and needs more nutrition.
Super soil may reduce the need for frequent liquid feeding. However, it does not guarantee complete nutrition for every plant. Container size, plant age, soil volume, watering, and the strength of the recipe all affect how long the nutrients last. Soil and plant conditions must still be observed.
Living Soil
Living soil is built around a community of microorganisms and other small organisms. This community may include bacteria, fungi, protozoa, nematodes, and tiny arthropods. Together, they help break down organic matter and move nutrients through the soil.
Plant roots release sugars and other compounds into the root zone. Some microorganisms use these materials as food. Their activity can help change organic nutrients into forms that roots can absorb. Fungi may also extend through the soil and help plants reach water and nutrients.
A living soil mix often contains compost, worm castings, peat or coco, aeration material, and organic amendments. The ingredients may look similar to those in super soil. The main difference is the focus on protecting and maintaining the soil ecosystem.
Harsh chemical treatments, long periods of drought, waterlogging, and extreme pH can harm soil organisms. Living soil should remain lightly moist without staying saturated. Good aeration is needed because many helpful organisms require oxygen.
Mulch can protect the soil surface and slow water loss. Clean straw, shredded leaves, or another suitable material may be used. Cover crops are sometimes grown on the soil surface to protect structure and support biological activity. However, these plants also use water and must be managed carefully.
Large containers are often useful for living soil because they provide more space for roots and organisms. A greater soil volume can also buffer changes in moisture, temperature, and nutrient levels. Small containers dry quickly and may be harder to keep biologically stable.
Living soil can be reused when it remains healthy. Old roots may be removed, and the soil can be refreshed with compost, worm castings, and selected amendments. Soil testing helps prevent the repeated addition of nutrients that are already present.
Choosing the Right System
Regular potting soil is usually the simplest option for growers who want direct control over feeding. It can be purchased ready to use and adjusted with extra aeration. However, the plant may need regular fertilizer after the soil’s starter nutrients are used.
Super soil requires more preparation. A proper recipe must be measured, mixed, moistened, and rested. Once stable, it may supply nutrients for much of the plant’s growth. The main risks are excessive nutrient strength and uneven amendment levels.
Living soil requires attention to the entire soil ecosystem. It often works best in larger containers and may need mulch, steady moisture, and high-quality compost. The system can support repeated growing cycles, but it takes time to build and maintain.
Cost should also be considered. Regular potting soil may have a lower starting cost, but added fertilizers can increase the total. Super soil requires several amendments at the beginning. Living soil may cost more to establish, but healthy soil can be reused and improved over time.
The best choice depends on the grower’s time, space, experience, and preferred method of plant care. A simple and well-managed system is more useful than a complex soil recipe that cannot be monitored correctly.
Regular potting soil provides a light growing medium and often depends on added fertilizer. Super soil contains a strong supply of organic amendments that release nutrients over time. Living soil focuses on an active ecosystem that breaks down organic matter and supports nutrient cycling. Each system needs good drainage, proper moisture, suitable pH, and careful observation. Regular soil offers simple control, super soil may reduce frequent feeding, and living soil can support long-term reuse. The right choice should match the grower’s experience, container size, available time, and growing conditions.
What Soil Mix Is Best for Seedlings and Autoflowers?
Cannabis seedlings and autoflowering plants often need a lighter soil mix than mature photoperiod plants. Their roots can be sensitive to excess nutrients, poor drainage, and sudden changes in moisture. A rich soil may appear helpful, but it can damage young roots before the plant has developed enough to use the available nutrition.
A suitable mix should feel light and loose. It should hold some water while allowing extra moisture to drain. Nutrient levels should be mild during early growth. Seedlings and autoflowers may also benefit from soil that allows roots to spread without becoming compacted.
The best mixture depends on the ingredients, container size, climate, and watering method. A soil recipe should always be tested before it is used for several plants.
Soil for Seedlings
Seedlings begin with a small and delicate root system. The first root to leave the seed is called the taproot. It grows downward and begins forming smaller side roots. These young roots need moisture, oxygen, and physical space, but they do not need a strong supply of fertilizer.
A seed-starting mix can use peat moss or coco coir as the main base. Perlite, pumice, or rice hulls can be added to improve drainage. A small amount of mature compost or worm castings may provide gentle nutrition. The finished mix should not contain large amounts of blood meal, guano, fresh manure, or other strong amendments.
The soil should be fine enough to surround the small root but not so fine that it becomes dense. Large pieces of bark can create gaps around the seed. Powdery material can pack together and hold too much water. A light and even texture supports steady root contact.
Seedlings are easy to overwater because their roots use very little moisture. A large wet area around a small plant may stay saturated for a long time. Water should be applied gently near the root zone. The soil should remain slightly moist, but it should not feel muddy or remain soaked.
Drainage holes must stay open. A small seedling container can help control moisture because it contains less soil. However, the plant may need to be transplanted after its roots fill the container. Transplanting should be done carefully to avoid breaking the root ball.
Seedlings can also be started in their final containers. This avoids transplant stress, but watering requires more care. Only the area around the young root should receive water at first. Soaking the entire large container may keep the soil wet for too long.
Seed leaves provide stored energy during the plant’s first stage. Strong fertilizer is not needed as soon as the seed opens. The first true leaves and the overall growth rate provide better signs of plant health. Fertilizer should not be added only because the seed leaves begin to fade after the true leaves develop.
Soil for Autoflowering Cannabis
Autoflowering cannabis begins flowering according to age rather than a change in the light schedule. Its vegetative period is often shorter than that of a photoperiod plant. Severe stress during early growth can reduce its final size because it has less time to recover.
A light, well-drained soil supports quick root development. Peat moss or coco coir can form the base, while perlite or pumice creates air spaces. Mature compost or worm castings may supply mild nutrition. A strongly fertilized mix can cause burnt tips, dark leaves, and slow growth.
Autoflowers are often planted in their final containers. This reduces the need for transplanting during their short life cycle. However, a final container holds much more soil than a seedling can use. Careful watering is important during the first weeks.
Container size affects soil moisture. A very large pot may remain wet around a small root system. A very small pot may restrict root growth and dry too quickly later. The suitable size depends on the plant variety, soil type, climate, and available space.
The soil should remain loose throughout the growing cycle. Compacted soil limits oxygen and makes it harder for roots to spread. Fabric containers may improve airflow through the sides, but they can dry faster in hot or windy areas. Plastic containers hold moisture longer and need clear drainage holes.
Autoflowers may not need heavy feeding. Their size, growth speed, and short life cycle affect how much nutrition they can use. A mild soil can be supplemented when clear signs show that nutrients are running low. It is usually harder to remove excess nutrients than to add a controlled amount later.
Creating Soil Layers
Layering can protect young roots while providing nutrition for later growth. Mild soil is placed in the upper part and center of the container. Richer soil is placed deeper or around the outer area. The seedling begins in the gentle mix and reaches the stronger soil as its roots expand.
The mild layer should contain a light base, good aeration, and a limited amount of compost or worm castings. It should not be empty of nutrients, but it should be gentle enough for new roots.
The richer lower layer may contain more compost and measured organic amendments. It must be mixed evenly and allowed to rest if it contains materials that need time to break down. Hot, unfinished soil should never be placed in the container.
The border between layers should not contain a solid band of concentrated fertilizer. Roots may be damaged when they reach it. A gradual change is safer than a sharp line between weak and strong soil. Some of the mild and rich mixes can be blended at the boundary.
Layered soil does not guarantee that the plant will receive the correct amount of each nutrient. Roots grow in different directions, and water moves nutrients through the container. Soil pH, drainage, moisture, and amendment strength still need attention.
A small test can help before the same layered recipe is used for several plants. Plant response should be watched for burnt tips, dark leaves, yellowing, slow growth, and poor drainage.
Seedlings and autoflowers grow best in light soil with good drainage, open air spaces, and mild nutrient levels. Young roots can be damaged by strong fertilizer and constant moisture. Autoflowers may be started in their final containers to avoid transplant stress, but careful watering is needed while their roots are small. Soil layering can place mild soil near the seedling and richer soil deeper in the pot. The change between layers should be gradual and free from concentrated fertilizer pockets. A balanced mix supports early root growth and gives the plant access to more nutrition as it becomes larger.
How Do You Maintain and Reuse Cannabis Soil?
Cannabis soil can often be reused when it remains clean, loose, and free from serious disease. Reusing soil can reduce waste and lower the cost of buying new growing media. However, used soil should not be treated as if it were fresh. A completed plant may leave behind old roots, compacted material, reduced nutrients, fertilizer salts, and possible pests.
The soil must be inspected and prepared before another plant is placed in it. Texture, drainage, pH, odor, nutrient content, and plant history should all be considered. Soil from a healthy plant is a better candidate for reuse than soil from a plant with root disease or a major pest problem.
Removing Old Roots and Plant Material
The first step is to remove the old stem and large root ball. Allowing the soil to become slightly dry can make this process easier. Turn the container onto a clean surface and gently break apart the soil.
Large woody roots should be removed because they take a long time to break down. Small fine roots may remain in healthy living soil. Microorganisms can slowly decompose them and return some organic matter to the mix. However, too many roots can reduce air space and make the soil difficult to mix.
Old leaves, stems, labels, support ties, and mulch should also be inspected. Clean plant material may be composted under suitable conditions. Material from diseased plants should be kept away from reusable soil and healthy compost.
The previous plant’s condition is important. Soil from a plant affected by root rot, wilt disease, harmful fungi, root-feeding insects, or unknown decline may carry the same problem into the next cycle. Reusing this soil without testing or treatment can place new roots at risk.
A sour or rotten odor is a warning sign. Healthy soil usually smells mild and earthy. Slimy roots, standing water, and dark compacted areas may show that the mix lacked oxygen. Severely damaged soil may be safer to replace than restore.
Rebuilding Soil Structure
Potting soil changes during use. Peat, coco, bark, and compost slowly break down into smaller particles. Repeated watering also causes the mix to settle. These changes reduce air spaces and may make drainage slower.
The used mix should be loosened by hand. Hard clumps can be broken apart and checked for wet centers or foul odors. Soil that becomes sticky, muddy, or dense may need more aeration material.
Perlite, pumice, rice hulls, or coarse coco fiber can restore drainage. Pumice lasts for a long time and is useful in soil that will be reused several times. Perlite is lighter and may break into smaller pieces after repeated handling. Rice hulls improve aeration but slowly decompose.
Fresh base material may also be needed. Peat moss or coco coir can replace material that has broken down. Mature compost and worm castings can improve structure and add organic matter, but too much can make the soil heavy.
The refreshed mix should be tested in a small container. Water should soak into the surface and leave through the drainage holes after the soil becomes wet. The soil should hold some moisture without staying saturated for several days.
Replacing Used Nutrients
A cannabis plant removes nutrients from the soil as it grows. Nitrogen, phosphorus, potassium, calcium, magnesium, sulfur, and micronutrients may all decrease. However, the plant does not use every nutrient at the same rate.
Some nutrients may remain in the soil after harvest. Fertilizer salts may also build up, especially when strong liquid nutrients were used. Adding a complete set of amendments without testing can create excess levels.
A soil test provides useful information about pH and nutrient content. Electrical conductivity testing can help estimate the level of dissolved salts. High salt levels may show that the soil needs further treatment or should not be reused for sensitive seedlings.
Mature compost and worm castings can provide gentle nutrition. Dry organic amendments may also be added, but they should be selected based on soil needs. Kelp meal, gypsum, lime, and other materials each affect the soil in different ways.
Dolomite lime should not be added automatically during every reuse. It raises pH while supplying calcium and magnesium. Repeated use may push the soil above the preferred range. Gypsum supplies calcium and sulfur without raising pH in the same way, but it should still be measured carefully.
A heavily amended mix may need to rest before planting. Moisture allows microorganisms to begin processing the organic materials. The soil should remain loose and slightly damp during this period. It should be cool and have an earthy smell before roots are added.
Preventing Pests and Diseases
Used soil should be checked for fungus gnats, root aphids, mites, larvae, eggs, and other pests. The surface, old roots, drainage holes, and sides of the container should all be inspected.
Fungus gnats often appear when soil remains wet for long periods. Adult gnats are small flying insects, while their larvae live in the upper soil. Improving drainage and allowing the surface to dry may help reduce conditions that support them.
Root aphids and other root pests can be harder to detect. They may appear as small moving insects or waxy material around the roots. Soil with a serious infestation should be isolated from healthy plants.
Containers, tools, and work surfaces should be cleaned before the refreshed soil is used. Reusing soil while placing it back into a dirty pot can return pests or disease organisms to the root zone.
Heat treatment may kill some organisms, but it can also destroy beneficial soil life and change the soil structure. Chemical treatments may leave residue or harm helpful microorganisms. Replacement is often the safest choice when the exact disease or pest is unknown.
Storing Unused Soil
Refreshed soil should be stored in a cool and protected place. Direct sun and extreme heat can dry the mix and harm biological activity. Heavy rain can waterlog the soil and wash away nutrients.
The soil should be slightly moist if it contains active microorganisms. It should not be wet enough to become muddy or develop a sour smell. Completely dry storage may reduce biological activity and make peat difficult to moisten again.
A clean container with a loose-fitting lid can protect the mix from insects, animals, weed seeds, and debris. Some airflow is useful, especially if the soil contains fresh compost or amendments. Warm or active soil should not be sealed tightly.
Stored soil should be labeled with the date, previous crop, and amendments added. This record helps prevent repeated feeding or pH adjustment. The soil should be checked again before planting because its moisture, pH, and structure may change during storage.
Cannabis soil can be reused when it comes from healthy plants and remains free from serious pests or disease. Large roots and old plant material should be removed before the mix is refreshed. Perlite, pumice, coco, compost, and worm castings can help restore structure and organic matter. Nutrients should be replaced according to testing rather than guesswork. Used soil must also be checked for salt buildup, poor drainage, foul odors, and insects. Clean storage and clear records help protect the refreshed mix until it is needed. Careful preparation can make reused soil a stable growing medium for another cycle.
Conclusion: Building a Balanced Soil Mix for Healthy Cannabis
A healthy cannabis plant starts with a healthy root zone. Roots need access to water, oxygen, and nutrients throughout the plant’s life. A suitable soil mix supports these needs without remaining soaked, drying too quickly, or supplying more fertilizer than the roots can handle. The best mix is not always the one with the most ingredients. It is the one that creates balanced and stable conditions.
Good drainage is one of the most important features of cannabis soil. Water should move through the container and leave through open drainage holes. Soil that remains wet for too long can reduce the amount of oxygen available to the roots. Low oxygen levels may slow growth and increase the risk of root disease. Perlite, pumice, rice hulls, coarse coco fiber, and aged bark can help create open spaces for air and water movement.
The soil must also hold enough moisture for the plant to use. A mix that drains too quickly may dry before the roots can absorb enough water. Peat moss, coco coir, compost, and worm castings can help retain moisture. The correct balance depends on the growing environment. Warm and dry conditions may require greater water retention. Cool or humid conditions often require faster drainage.
Texture provides useful information about soil quality. A balanced mix should feel loose and light. Moist soil should hold together briefly when squeezed, then break apart easily. Soil that forms a hard or sticky lump may be too dense. A mix that falls apart at once or allows water to pass through without wetting the center may not hold enough moisture.
Cannabis soil should also contain a suitable nutrient supply. Nitrogen, phosphorus, and potassium support major plant processes. Calcium, magnesium, sulfur, and several micronutrients are also essential. However, the amount required changes during the plant’s life.
Seedlings need mild soil because their roots are small and sensitive. A rich or “hot” mix can burn young roots and cause dark leaves, dry tips, or slow growth. Mature plants can use more nutrients, but heavy feeding does not guarantee larger yields. Excess fertilizer can increase salt levels and prevent roots from taking in water.
Soil pH affects whether the plant can use the nutrients that are present. Cannabis grown in soil usually performs well at a slightly acidic pH between about 6.0 and 7.0. Many growers aim for a range near 6.2 to 6.8. A pH that stays too high or too low can make certain nutrients difficult to absorb. This problem may cause yellow leaves, spots, or weak growth even when fertilizer is present.
Testing should come before major pH or nutrient corrections. A calibrated digital meter, soil slurry test, or laboratory analysis can provide useful information. Runoff readings may help show general changes, but they do not always represent the entire root zone. Written records of soil pH, water pH, feeding, watering, and plant symptoms can make patterns easier to identify.
A simple homemade soil mix can begin with a base material, mature organic matter, and an aeration ingredient. Peat moss or coco coir can form the base. Compost or worm castings can provide organic matter and mild nutrition. Perlite or pumice can improve drainage and airflow. These materials should be mixed evenly so that the container does not contain dense areas or concentrated nutrient pockets.
Organic amendments can create a richer mix, but each one should have a clear purpose. Kelp meal, bone meal, blood meal, gypsum, lime, and mineral dust affect soil in different ways. Measurements from one recipe may not work with every product because amendment strength varies. Product directions and soil test results provide a safer guide than guesswork.
Heavily amended organic soil may need time to rest before planting. Microorganisms begin breaking down the materials during this period. The mix may become warm while this activity is high. Roots should not be placed in soil that feels hot or smells sour. Stable soil should be cool, loose, and earthy-smelling.
Living soil, super soil, and regular potting soil can all support cannabis. Regular potting soil often depends on added fertilizer after its starter nutrients run low. Super soil contains a richer supply of organic amendments that release nutrients over time. Living soil focuses on a community of organisms that breaks down organic matter and supports nutrient cycling. Each system still needs proper drainage, moisture, pH, and monitoring.
Seedlings and autoflowers often perform best in a light and mildly fertilized mix. Autoflowers have a short vegetative period, so severe early stress may affect their final size. Starting an autoflower in its final container can reduce transplant stress, but the large soil volume must be watered carefully while the roots remain small. Soil layering may allow young roots to begin in a gentle mix and reach richer soil later.
Used cannabis soil can often be refreshed and reused when it comes from a healthy plant. Large old roots should be removed, and the soil should be checked for pests, disease, foul odors, and compaction. Fresh aeration material can restore structure. Compost or worm castings can replace some organic matter. Nutrients should be added according to testing because some elements may still be present.
Consistent observation is more useful than following a soil recipe without adjustment. Container size, temperature, humidity, plant age, and watering habits all affect how a mix performs. A soil blend that works well in one space may remain too wet or dry too quickly in another.
Balanced cannabis soil supports healthy roots, steady growth, and stronger plant development. Good results depend on controlling drainage, airflow, moisture, pH, and nutrient strength as one connected system. Careful testing and gradual changes help protect the roots from stress. Growers should also confirm that cannabis cultivation is permitted under their local laws before obtaining seeds or starting plants.
Research Citation
Burgel, L., Hartung, J., & Graeff-Hönninger, S. (2020). Impact of different growing substrates on growth, yield and cannabinoid content of two Cannabis sativa L. genotypes in a pot culture. Horticulturae, 6(4), Article 62. https://doi.org/10.3390/horticulturae6040062
Caplan, D., Dixon, M., & Zheng, Y. (2017a). Optimal rate of organic fertilizer during the flowering stage for cannabis grown in two coir-based substrates. HortScience, 52(12), 1796–1803. https://doi.org/10.21273/HORTSCI12401-17
Caplan, D., Dixon, M., & Zheng, Y. (2017b). Optimal rate of organic fertilizer during the vegetative stage for cannabis grown in two coir-based substrates. HortScience, 52(9), 1307–1312. https://doi.org/10.21273/HORTSCI11903-17
Caplan, D., Dixon, M., & Zheng, Y. (2019). Increasing inflorescence dry weight and cannabinoid content in medical cannabis using controlled drought stress. HortScience, 54(5), 964–969. https://doi.org/10.21273/HORTSCI13510-18
Chacon, F. T., Raup-Konsavage, S. A., Greenland, K., Gearhart, R., Desai, D., Zhou, S., Kellogg, J. J., & Raup-Konsavage, W. M. (2025). Impact of soil quality on cannabinoid and terpenoid content of Cannabis sativa L. Journal of Medicinally Active Plants, 14(2–3), 19–30. https://doi.org/10.7275/jmap.3150
Cockson, P., Landis, H., Smith, J. T., Hicks, K., & Whipker, B. E. (2019). Characterization of nutrient disorders of Cannabis sativa. Applied Sciences, 9(20), Article 4432. https://doi.org/10.3390/app9204432
Malík, M., & Tlustoš, P. (2025). Soilless growing media for cannabis cultivation. Agriculture, 15(18), Article 1955. https://doi.org/10.3390/agriculture15181955
Nemati, R., Fortin, J.-P., Craig, J., & Donald, S. (2021). Growing mediums for medical cannabis production in North America. Agronomy, 11(7), Article 1366. https://doi.org/10.3390/agronomy11071366
Schober, T., Präger, A., Hartung, J., Hensmann, F., & Graeff-Hönninger, S. (2023). Growth dynamics and yield formation of cannabis (Cannabis sativa) cultivated in differing growing media under semi-controlled greenhouse conditions. Industrial Crops and Products, 203, Article 117172. https://doi.org/10.1016/j.indcrop.2023.117172
Trancoso, I., de Souza, G. A. R., dos Santos, P. R., dos Santos, K. D., de Miranda, R. M. dos S. N., da Silva, A. L. P. M., Santos, D. Z., García-Tejero, I. F., & Campostrini, E. (2022). Cannabis sativa L.: Crop management and abiotic factors that affect phytocannabinoid production. Agronomy, 12(7), Article 1492. https://doi.org/10.3390/agronomy12071492
Questions and Answers
Q1: What is the best soil mix for cannabis?
A suitable cannabis soil mix is light, well-draining, and rich in organic matter. Common ingredients include potting soil, compost, perlite, and coco coir or peat moss.
Q2: What pH should a cannabis soil mix have?
Cannabis soil generally performs best at a pH between 6.0 and 7.0. A range of 6.2 to 6.8 often supports steady nutrient absorption.
Q3: Why is drainage important in cannabis soil?
Good drainage allows excess water to leave the root zone. It may reduce the risk of root rot, mold, slow growth, and nutrient problems.
Q4: Can regular garden soil be used for cannabis?
Regular garden soil may be too dense and may contain pests, weed seeds, or harmful organisms. Adding compost and aeration materials may improve its structure.
Q5: How much perlite should be added to cannabis soil?
Perlite often makes up 20% to 30% of a cannabis soil mix. The correct amount depends on the density of the base soil and its drainage rate.
Q6: What organic materials can improve cannabis soil?
Compost, worm castings, aged manure, kelp meal, and bone meal may add nutrients and support beneficial soil organisms.
Q7: Is coco coir suitable for a cannabis soil mix?
Coco coir helps soil hold moisture while allowing air to reach the roots. Added calcium and magnesium may be needed because coco coir contains few nutrients.
Q8: What is living soil for cannabis?
Living soil contains beneficial bacteria, fungi, and other organisms. These organisms break down organic matter and help make nutrients available to cannabis plants.
Q9: What are the signs of compacted cannabis soil?
Compacted soil may drain slowly, remain wet too long, or become hard. Cannabis plants may develop drooping leaves, weak roots, and slow growth.
Q10: Can cannabis soil mix be reused?
Cannabis soil may be reused after old roots are removed and the mix is refreshed with compost, worm castings, and aeration materials. Soil affected by pests or disease should be discarded.